How to Build a Shelter with a Utility Knife: Survival Tips and Tricks
How to Build a Shelter with a Utility Knife:
Survival Tips and Tricks
The right tools can make a difference when you're out in
the wild. Most survival kits have lots of gear, but imagine if you only had a
utility knife. You might think of a utility knife as something for urban tasks,
but it's a versatile and reliable survival tool if you use it correctly. Check
out this guide on building a shelter using only a utility knife and a few
natural resources. With the right tools, you can feel confident handling any
survival situation.
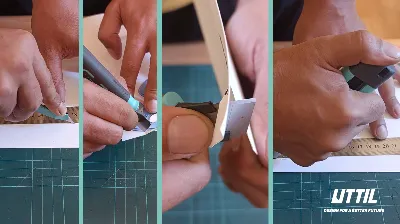
Why a Utility Knife?
The utility knife, especially one with a snap-off or
durable fixed blade, is a versatile and indispensable tool for survival
scenarios. Its lightweight, compact, and easy-to-carry nature makes it the
perfect tool for cutting and shaping various materials. While it's typically
used for cutting cardboard or trimming materials daily, its sharp blade and
portability make it a surprisingly effective tool for wilderness survival. This
versatility empowers you to handle a variety of tasks in a survival situation.
Step 1: Choose the Right Location
Before you begin cutting and building, selecting the
right location is the cornerstone of your survival strategy. Look for:
1.
Natural Windbreaks:
Hills, rock formations, or dense foliage can protect you from strong winds.
2.
Dry Ground:
Avoid valleys or depressions where water might accumulate.
3.
Proximity to Resources:
Ensure you're near water, food sources, and building materials such as fallen
branches, leaves, and grass.
Once you've scouted your spot, gather materials and use
that utility knife.
Step 2: Gathering Materials
In a survival scenario, you must gather materials to
construct your shelter. Here's how you can effectively use your utility knife:
- Cutting
Branches and Poles: Look for sturdy branches,
straight and forked, to serve as the primary support beams of your
shelter. A utility knife's sharp blade can cut through smaller branches or
strip bark for cordage.
- Processing
Vines or Flexible Saplings: You can use your
knife to cut vines or flexible branches to tie your structure together.
Utility knives, especially with a sharp edge, are excellent for creating
these more minor cuts.
- Clearing
Vegetation: Sometimes, you may need to clear an
area or collect leaves and grass for insulation. The knife will help clear
out more diminutive plants and trim vegetation to make a cleaner, more
comfortable shelter site.
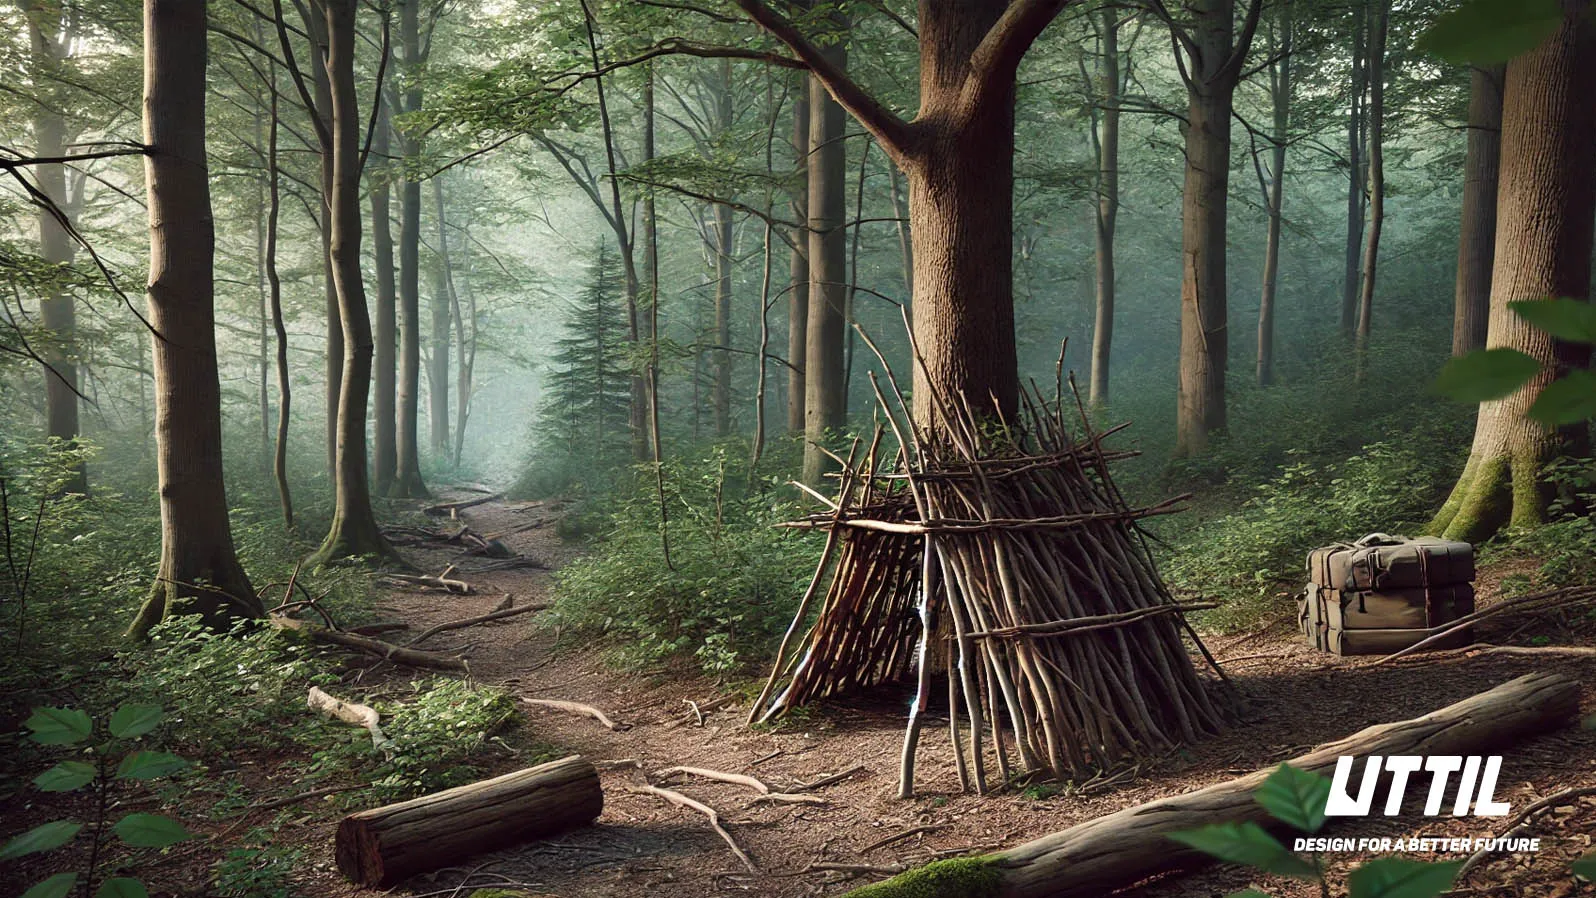
Step 3: Basic Shelter Designs
Now that you have your materials let's focus on the type
of shelter you can build. Your utility knife will be key to customizing your
design and ensuring its durability.
1.
Lean-To Shelter
The lean-to is one of the simplest shelters to build with
a utility knife. Here's how to make one:
1.
Find a Strong Ridgepole:
This main beam will support your shelter. Lean one end against a tree or a
large rock, then secure it with vines or flexible branches you cut with your
knife.
2.
Cut Support Poles:
Using your utility knife, cut smaller branches to lean against the ridgepole at
an angle, creating the basic structure of the shelter.
3.
Create a Covering:
Next, use your knife to cut larger leaves, grass, or strips of bark to layer on
top of the structure. This provides insulation and protection from the
elements.
4.
Debris Hut
The debris hut is excellent for colder environments,
providing insulation and warmth. Here's how:
1.
Find Two Forked Sticks:
These will form the entrance and back of your shelter. Cut them to the
appropriate size using your utility knife, and anchor them firmly in the
ground.
2.
Create a Backbone:
Lay a long, sturdy branch across the forked sticks to form the backbone of the
shelter.
3.
Pile on Branches and Leaves:
Cut small branches and pile them onto the sides of the backbone to create the
framework. Then, use your knife to cut and layer leaves, moss, and grass to
cover the frame. This helps trap body heat inside.
Step 4: Crafting Basic Survival Tools
Your utility knife can help you craft various tools and
improvements to make your shelter more secure and functional:
- Cutting
Notches: Need to secure branches together or
fashion a trap? A utility knife can cut precise notches in wood, creating
a secure lashing point for vines or cordage.
- Shaping
Stakes: Use your knife to whittle stakes to
secure your shelter or build other survival tools, such as cooking spits
or tripods for hanging supplies.
- Cordage
from Bark: If you don't have any cord or rope,
you can create makeshift cordage by using your knife to strip the inner
bark of trees like willow or basswood. Braiding these strands together
forms surprisingly strong ties for your shelter.
Step 5: Ensure Shelter Stability and
Insulation
Once your structure is standing, make sure it's stable.
You can use your utility knife to:
- Trim
Edges: Use the knife to trim sharp or uneven edges on
branches, making your shelter safer and more secure.
- Cut
Leaves or Moss for Insulation: If it's cold, use
your utility knife to cut large leaves or gather moss to line the inside
of your shelter. This will help to insulate it and trap warmth.
Why UTTIL Utility Knives?
If you're looking for a utility knife for survival, UTTIL's
range offers the durability, sharpness, and versatility you need. UTTIL
utility knives are designed with ergonomic handles, making them comfortable for
extended use. They also come with quickly replaceable blades, ensuring you
always have a sharp edge, no matter how challenging the conditions.
Building a shelter in the wild with just a utility knife
is not only possible but, with the proper techniques, an efficient and
practical solution. A sharp utility knife is an invaluable tool for cutting,
shaping, and securing materials for a shelter. Whether crafting a lean-to or a
debris hut, the key to survival is having the right tools—and with UTTIL
utility knives, you're always prepared.